The most common waterproofing methods are actively destroying your masonry by trapping moisture, turning a minor issue into a structural failure.
- Non-breathable materials like cement render and acrylic paints create a sealed plastic bag around your home, causing water to build up internally.
- True facade protection relies on “vapor permeability”—using materials that block liquid water but allow water vapor to escape.
Recommendation: Before applying any product, diagnose the root cause of moisture and choose breathable, sacrificial materials like lime or silicate that work with your building, not against it.
As a homeowner with a classic brick or stone property, noticing those persistent damp patches or crumbling mortar can be deeply unsettling. The immediate instinct is to find the quickest way to seal the wall and keep water out. The market is flooded with products promising an impermeable barrier, a quick fix in a can. This approach, however, often stems from a fundamental misunderstanding of how older masonry buildings manage moisture.
The conventional wisdom of applying a thick, waterproof coating is not just ineffective; it’s a trap. These solutions treat the symptom—water ingress—while creating a much more severe disease: trapped moisture. An older wall is not a static, dry object; it’s a dynamic system that needs to “breathe.” When you prevent this natural process, you initiate a cycle of decay that can lead to spalling bricks, rotted structural timbers, and costly, long-term damage.
The true key to waterproofing your facade lies in a counter-intuitive principle: you must help the wall release moisture, not just block it from entering. This involves understanding the science of vapor permeability and selecting materials that restore the building’s inherent ability to stay dry. It’s about working in harmony with the original structure, not fighting it with a modern, plasticized shield.
This guide will walk you through the critical principles of proper facade protection. We will deconstruct the common mistakes that accelerate decay and provide a structural framework for repairing and maintaining your home’s exterior, ensuring its health and integrity for decades to come.
Table of Contents: A Structural Approach to Facade Health
- Why Cement Rendering Can Destroy Old Brickwork Within 10 Years?
- The Cleaning Mistake That Strips the Protective Layer Off Your Siding
- How to Fix Facade Cracks So They Don’t Reappear Next Winter?
- Silicate or Acrylic: Which Paint Lasts Longer on Exposed Stucco?
- When to Paint Exterior Walls: Avoiding the Humidity Trap
- How to Build a Retaining Wall That Won’t Bulge With Water Pressure?
- How to Install Storm Shutters on Second-Story Windows Safely?
- How to Paint a Nursery Without Exposing Your Baby to Harmful Fumes?
Why Cement Rendering Can Destroy Old Brickwork Within 10 Years?
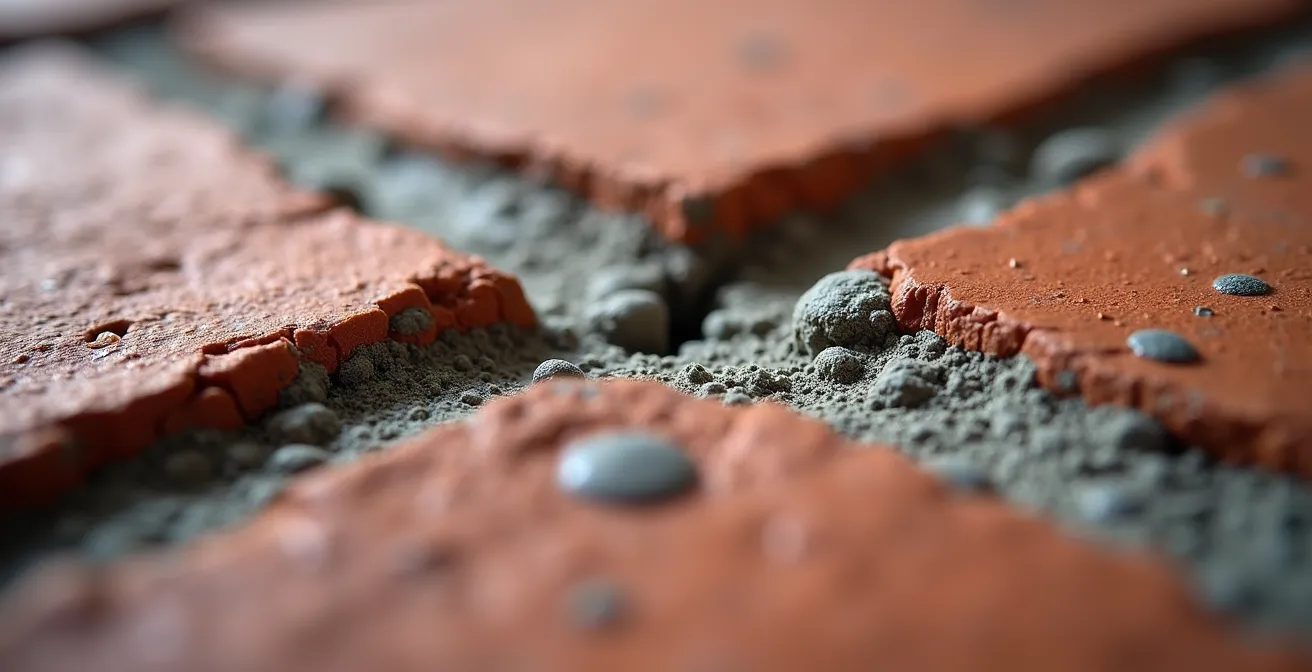
One of the most damaging interventions on a traditional home is the application of a modern cement-based render. Marketed as a strong, durable, and waterproof solution, it is fundamentally incompatible with the soft, porous nature of old bricks and lime mortar. A traditional wall is designed to absorb moisture from the environment and release it as vapor. Cement render, being dense and largely impermeable, shatters this equilibrium. It effectively wraps the wall in a non-breathable shell.
Rainwater inevitably finds its way behind the render through tiny cracks or at junctions with windows and roofs. Once inside, the water is trapped. It cannot evaporate outwards through the cement. Instead, it soaks into the brickwork, raising its moisture content to critical levels. According to building pathology research, a brick moisture content above 20% creates a “damage likely” scenario. The trapped water, when it freezes in winter, expands and causes the brick face to ‘spall’ or break apart behind the render. Over time, the mortar joints dissolve, and the structural integrity of the wall is compromised, all hidden from view.
The consequences become starkly visible over a few years. You may see the render “blowing” or detaching in large sheets, revealing a saturated, crumbling wall beneath. Internally, damp patches and black mold will appear as the moisture is forced to travel inwards.
Case Study: Grade 2 Listed Building Rescue
A prime example of this destructive cycle was observed in a Grade 2 listed building near London. As detailed in a report on cement render damage by Heritage House, the property suffered from severe internal damp after being coated in a thick cement render. The solution was not to add more waterproofing but to painstakingly remove the cement. This process, which took two years and involved collaboration with English Heritage, revealed the saturated, damaged brickwork underneath. Once the cement was gone, the building was restored with a traditional, breathable lime render. The result was a structure that could finally dry out, becoming warm, dry, and structurally sound once more.
Action Plan: Diagnosing Cement Render Moisture Damage
- External Inspection: Gently tap the render. Check for hollow sounds which indicate detachment from the wall. Look for peeling, cracking, or bubbling paint on the render surface.
- Internal Wall Check: Inspect interior walls for signs of damp, such as plaster falling off, blistering paint, or musty smells, especially on the ground floor.
- Mortar and Brick Health: Where possible, examine the brickwork below the render line or in exposed areas. Look for salt efflorescence (white, powdery deposits) and deteriorating mortar joints.
- Moisture Measurement: Use a pinless moisture meter on the affected interior and exterior walls. Consistent high readings are a major red flag that moisture is trapped.
- Professional Assessment: If multiple signs are present, consult a surveyor specializing in historic buildings to confirm the extent of the damage before taking any action.
The Cleaning Mistake That Strips the Protective Layer Off Your Siding
In the quest for a pristine facade, homeowners often turn to aggressive cleaning methods like high-pressure washing or harsh chemical treatments. While this can provide a satisfyingly instant “clean” look, it can inflict irreversible damage, particularly on older brickwork. Many historic bricks have what is known as a “fire-skin” or patina. This is the hard, vitrified outer face of the brick, formed during the firing process, which provides its primary defense against weather.
Aggressive cleaning, especially pressure washing, can strip this protective layer away. It’s akin to removing the enamel from a tooth. The exposed, softer core of the brick is far more porous and absorbent. A wall that was once weather-resistant now acts like a sponge, absorbing rainwater and increasing its vulnerability to frost damage and saturation. You are, in effect, creating the very problem of moisture ingress you sought to prevent.
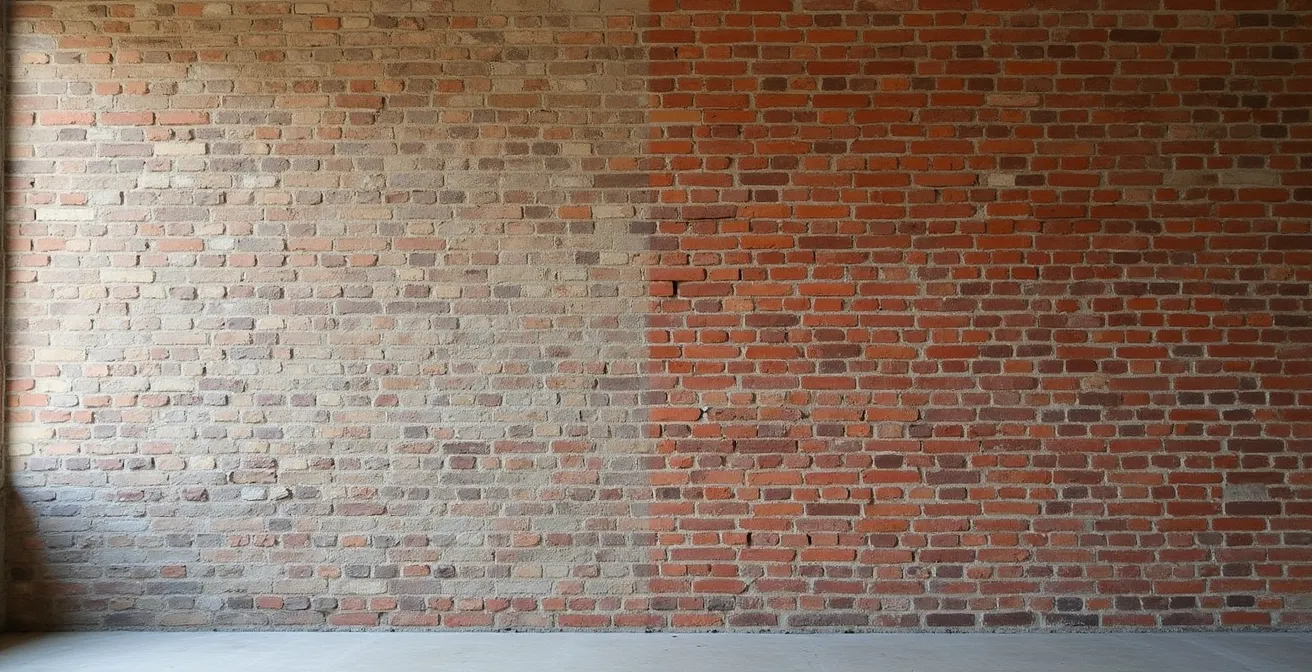
As the image above demonstrates, a stable, aged patina can be a sign of a healthy, well-preserved wall. The goal of cleaning should be to remove harmful biological growth (like aggressive ivy) or pollutants, not the wall’s natural defenses. The correct approach is to use low-pressure water, gentle detergents, and soft brushes, always testing on an inconspicuous area first. Preserving the fire-skin is paramount to the long-term health of your facade.
How to Fix Facade Cracks So They Don’t Reappear Next Winter?
Finding cracks in your facade is alarming, but a hasty repair can be worse than no repair at all. The common mistake is to fill a crack with a hard, rigid material like a standard cement-based mortar or a cheap caulk. A building is not static; it moves. It expands and contracts with temperature changes and settles over time. A rigid patch cannot accommodate this movement. The result is predictable: the building moves, the patch doesn’t, and a new crack appears right alongside the old repair, often within a single season.
The professional solution is to treat the crack not as something to simply fill, but as a movement joint that needs to be managed. The first step is to properly prepare the crack. Instead of just smearing filler over the top, the crack should be opened up into a “V” shape using a grinder or a masonry chisel. This creates a wider surface area for the new material to adhere to, ensuring a much stronger, more durable bond.
Once the V-cut is clean and free of dust, the key is to use a flexible, breathable repair mortar or a high-quality elastomeric sealant. These materials are designed to stretch and compress with the building’s natural movement. They form a strong bond but remain pliable, preventing the stress from building up and causing a new fracture. By preparing the joint correctly and using a material that respects the building’s dynamic nature, you create a repair that lasts through seasonal cycles, truly sealing the entry point for water.
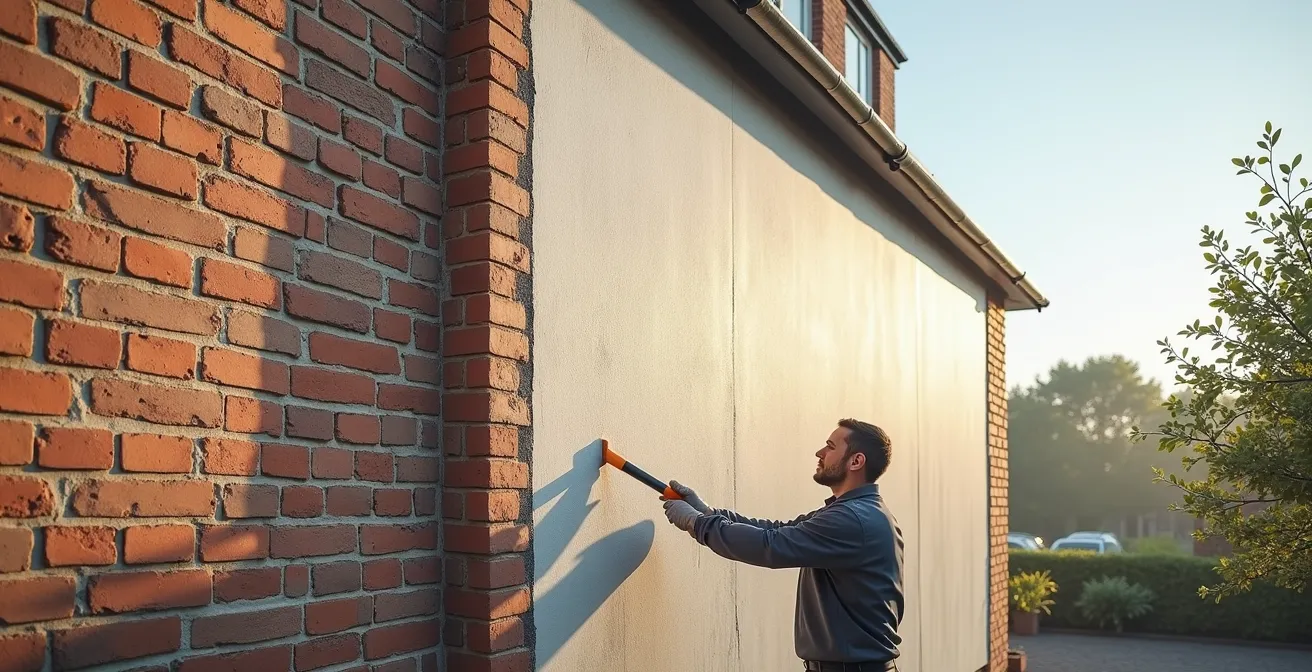
Silicate or Acrylic: Which Paint Lasts Longer on Exposed Stucco?
Choosing the right paint for your facade is one of the most critical decisions you will make. The market is dominated by acrylic-based masonry paints, which are essentially a liquid plastic. They form a film over the surface that is tough and water-resistant, but crucially, it has very low vapor permeability. It seals the wall, preventing it from breathing. As we’ve established, this is a recipe for disaster on traditional masonry that needs to release moisture.
The superior alternative is a silicate-based paint. Unlike acrylics, which are a surface coating, silicate paints work through a chemical process called silicification. They penetrate the substrate and form a permanent, micro-crystalline bond with the mineral content of the stucco, brick, or stone. This bond is incredibly durable and will not peel or flake like a film. Most importantly, it is highly vapor permeable. It creates a waterproof barrier to liquid rain while allowing trapped water vapor to escape freely.
This aligns with the requirements of historic structures. As masonry experts specify, historic lime mortars have a high perm rating, and any coating applied must have equal or greater permeability to function correctly. Acrylic paints fail this test, while silicate paints excel. This is why they last significantly longer; they don’t fight the building, they become part of it.
Adding modern impermeable layers can change the initial balance, running the risk of trapping water inside certain substructures, thus leading to accelerated degradations.
– Maria-Cristina Florian, ArchDaily – Building Envelope Analysis
When to Paint Exterior Walls: Avoiding the Humidity Trap
Even with the perfect breathable paint selected, the entire project can be compromised by poor timing. Applying a coating to a wall that is already damp or saturated is a critical error. Paint, even breathable paint, requires a dry, stable substrate to bond correctly. Applying it to a damp surface traps that pre-existing moisture, leading to blistering, peeling, and premature failure of the coating.
The wall must be allowed to dry out completely before any work begins. This is not something that can be judged by eye. A surface may feel dry to the touch while the underlying structure is still holding significant moisture. The only reliable way to know is to use a professional moisture meter. As a rule of thumb, waterproofing professionals recommend that walls must have a consistent moisture reading below 15% Wood Moisture Equivalent (WME) before any coating is applied. This may require waiting weeks, or even months, after a period of heavy rain or after stripping an old, non-breathable render.
Patience is a structural requirement. You must also consider the weather forecast. Do not paint if rain is expected within 24-48 hours, or if humidity levels are high. Ideal conditions are a series of warm, dry, and breezy days. Attempting to rush the job during a damp season will only ensure you have to do it all over again in a year or two. Proper preparation and timing are as important as the material itself.
How to Build a Retaining Wall That Won’t Bulge With Water Pressure?
A home’s moisture problems don’t always start at the wall’s surface; they can begin in the ground surrounding it. A poorly constructed retaining wall near your home can fail to manage groundwater, leading to immense hydrostatic pressure. This is the force exerted by standing water, and it can cause retaining walls to bulge, crack, or even collapse. More critically for your home, this same pressure can force water into your foundations and lower-level masonry, creating persistent damp issues from the ground up.
A retaining wall that lasts is one that is designed with water management as its primary function. A solid concrete or block wall without drainage is simply a dam, and it will eventually fail. A durable retaining wall must incorporate three key elements:
- A Solid, Compacted Gravel Base: The wall must sit on a deep, well-drained foundation of compacted gravel, extending below the frost line for your region. This prevents heaving and provides a stable footing.
- Effective Backfill and Drainage: The space directly behind the wall should not be filled with soil. It must be filled with a foot or more of clean drainage gravel. At the base of this gravel, a perforated “French drain” pipe should be installed, designed to collect water and channel it away to a safe discharge point downhill.
- Weep Holes or Geotextile Fabric: The gravel backfill should be separated from the surrounding soil by a geotextile filter fabric. This allows water to pass through but prevents soil from clogging the gravel. Small “weep holes” through the base of the wall itself provide an additional escape route for any accumulated water.
By designing a retaining wall to relieve hydrostatic pressure rather than resist it, you protect not only the wall itself but also the foundations of your nearby home from the relentless force of groundwater.
How to Install Storm Shutters on Second-Story Windows Safely?
While managing moisture within the masonry is a microscopic battle, protecting your facade also involves macroscopic defense against the elements. Storm shutters are a primary form of mechanical protection, shielding windows and surrounding walls from wind-driven rain and flying debris. However, their installation, especially on second-story windows, presents significant safety risks that must be managed with a professional’s mindset.
The primary concern is working at height. Never use a standard stepladder placed on uneven ground. The correct equipment is either a properly erected scaffold tower with guardrails or an extension ladder with a stabilizer bar at the top to provide a wide, secure stance against the wall. Ensure the ladder is set at the correct 75-degree angle (the 4-to-1 rule: for every four feet of height, the base should be one foot away from the wall). Always maintain three points of contact (e.g., two feet and one hand) when climbing or descending.
For the installation itself, precision is key to both safety and function. Measure everything twice before drilling. Ensure you are anchoring the shutter tracks or hinges into solid structural material—the wall studs or solid masonry—not just the siding or brick veneer. Use the correct type of fastener for the substrate: expansion anchors for masonry and heavy-duty lag bolts for wood framing. An improperly secured shutter is a hazard that can be torn off in a storm, causing more damage than it prevents.
Key Takeaways
- Prioritize Breathability: True waterproofing is about letting walls breathe. Always choose vapor-permeable materials like lime render and silicate paint over impermeable cement and acrylics.
- Diagnose Before Acting: Use a moisture meter and visual inspection to understand the root cause of damp before applying any product. Trapping existing moisture is the most costly mistake.
- Respect Original Materials: Avoid aggressive cleaning that strips the protective “fire-skin” from old bricks. Repair cracks with flexible materials that accommodate natural building movement.
How to Paint a Nursery Without Exposing Your Baby to Harmful Fumes?
Once your home’s exterior envelope is secure, dry, and structurally sound, attention logically turns to the health and safety of the interior environment. This is never more critical than when preparing a room for the most vulnerable member of the family. Standard paints can release Volatile Organic Compounds (VOCs) into the air for weeks or even months after application. These fumes can contribute to poor indoor air quality and have been linked to respiratory issues and other health concerns.
The protective, structural mindset used for the facade must be applied to the interior. The solution is to exclusively use paints labeled as “Zero-VOC” or “Low-VOC”. However, it’s important to be a discerning consumer. Some brands may claim “Zero-VOC” for the base paint, but the color tints added at the store can introduce VOCs back into the mix. Look for brands that guarantee their entire system, including the colorants, is zero-VOC.
Beyond the choice of paint, proper procedure is essential for minimizing exposure. Plan to paint the nursery at least a month before the baby is due to occupy it. Even with zero-VOC paint, good ventilation is crucial. Keep windows open during and after painting to allow any residual compounds and odors to dissipate completely. By selecting the right materials and following a safe timeline, you ensure the nursery is a healthy, welcoming, and non-toxic space.
By adopting a structural and scientific approach to your facade, you move from short-term fixes to long-term preservation. A thoughtful strategy based on breathability and material compatibility is the only way to ensure your home remains healthy, dry, and beautiful for generations.
Frequently Asked Questions on Facade Moisture Management
What happens when cement render is power washed on old brick?
This is a highly damaging combination. The high-pressure water can find or create micro-cracks in the render. Water then runs down the face of the stone or brick and gets behind the render, where it becomes trapped. This can build up to ridiculously high moisture levels, accelerating the decay of the underlying masonry as it tries and fails to evaporate.
How can I identify if my brick has a protective fire-skin?
The fire-skin is the hard, often slightly glossy, weather-resistant outer face of old, handmade bricks. A healthy fire-skin will feel solid and dense. If the surface of the brick appears soft, sandy, porous, or can be easily scratched away with a fingernail, it is a strong indication that the protective layer has been damaged or eroded by weathering or aggressive cleaning.
Should all discoloration on masonry be cleaned?
No. It is crucial to distinguish between harmful soiling and stable, protective patina. A patina that has formed over decades can act as a natural protective layer, much like the fire-skin. Only active and harmful biological growth (like mold or certain types of algae), or damaging pollutants should be targeted for careful removal. Unnecessary cleaning of a stable patina can cause more harm than good.