A leak-proof shower is not about the tile you see, but the invisible water management system you build underneath.
- The substrate is not the waterproofing; cement board itself is a sponge that must be rigorously sealed with a membrane.
- Adhesion is everything; hollow spots under tiles are guaranteed points of failure that will crack and allow water intrusion.
Recommendation: Stop thinking like a decorator and start thinking like a waterproofer. Master the system, not just the steps, and you will build with confidence.
The single greatest fear of any DIYer building a shower is not a crooked tile or a bad grout line. It is the silent, destructive power of a slow leak. Water damage from a failed shower can rot floors, destroy ceilings, and cost thousands to repair. The internet is full of advice, often contradictory, about using this sealant or that board. Most of it misses the fundamental point.
The secret is to stop thinking of this as a tiling project. You are building a zero-tolerance water management system inside your home. It is an engineered environment where every single component, from the hidden slope under the mortar to the final grout joint, must work in perfect concert to control water. Forget the generic advice. We are not decorating a wall; we are constructing a waterproof vessel. This requires a shift in mindset—from handyman to waterproofing expert.
This guide will not just give you steps. It will instill the non-negotiable principles of water control. We will dissect the most common failure points, from substrate preparation to adhesion mechanics, and reveal the professional methods that ensure a lifetime of leak-free service. We will even look at how the same principles apply to exterior facades and landscape drainage to prove their universal importance.
For those who want to see a critical validation step in action, the following video demonstrates a flood test. This is the professional’s final exam for any new shower pan—a non-negotiable proof of a watertight installation before any tile is laid.
To navigate this complex but critical subject, we have structured this guide to address each layer of the waterproofing system in a logical sequence. The following summary outlines the key areas we will cover to give you a complete, holistic understanding of the project ahead.
Summary: Building a Watertight Shower System
- Why Cement Board Is Not Waterproof on Its Own?
- How to Apply Epoxy Grout Without Making a Sticky Mess?
- Large Slabs or Small Mosaics: Which Is Safer for a Shower Floor?
- The Adhesion Mistake That Cracks Tiles When You Step on Them
- Layout Planning: Avoiding Tiny Tile Cuts at the Wall Edges
- How to Safely Route Laundry Water to Your Flower Beds?
- The Drainage Mistake That Creates Gullies Instead of Solving Them
- How to Waterproof Your Facade Without Trapping Moisture Inside?
Why Cement Board Is Not Waterproof on Its Own?
This is the most dangerous misconception in shower construction. Cement board is water-resistant, not waterproof. It will not swell or degrade like drywall when wet, but it is a porous material that will absorb and transmit water to the wall cavity behind it, leading to mold and rot. Think of it as a stable, inorganic sponge. Your job is to make that sponge completely impervious to water by creating a continuous membrane over its entire surface.
The waterproofing layer is the most critical part of the entire system. It can be a liquid-applied membrane (like RedGard or Hydro-Ban) or a sheet membrane (like Schluter-KERDI). Regardless of the product, the application must be flawless. This means no pinholes, complete coverage, and, most importantly, sealed seams and corners. Every screw penetration and every joint between boards is a potential point of failure that must be methodically addressed before the main waterproofing layers are applied.
A fatal error is creating what’s known as a “moisture sandwich.” This occurs when you place a vapor barrier (like plastic sheeting) behind the cement board *and* an impermeable membrane on the front. Moisture that inevitably gets into the cement board during construction or through vapor drive becomes trapped with no way to dry out, leading to catastrophic failure. You must choose one method: a barrier behind or a membrane on top. Never both.
Your Action Plan: Cement Board Waterproofing
- Install a vapor barrier behind the cement board to prevent moisture from reaching the studs, OR prepare to apply a membrane to the front (not both).
- Apply a liquid waterproofing membrane in a minimum of two coats, following the manufacturer’s specified thickness.
- Seal all seams with mesh tape embedded in thin-set mortar *before* applying the liquid waterproofing membrane.
- Visually inspect for pinholes after each coat dries. Hold a bright light against the surface to spot any imperfections.
- Commit to your system: either a membrane on the front of the board OR plastic sheeting behind it. Never create a double vapor barrier.
Treating the cement board as just a stable backer for your true waterproofing system is the first step toward a successful, leak-free installation.
How to Apply Epoxy Grout Without Making a Sticky Mess?
While we are discussing impenetrable barriers, it’s crucial to address the final seal of the system: the grout. Epoxy grout is the gold standard for a shower. Unlike cementitious grout, it is non-porous, stain-proof, and will not crack or shrink. It is, in essence, a plastic. However, it is notoriously difficult to work with. Once it starts to set, it becomes an immovable, sticky nightmare. The key to success is not speed, but meticulous preparation and process control.
The biggest mistake DIYers make is mixing too much epoxy at once. The chemical reaction has a set working time (pot life), and no amount of effort will stop it. Working in small, manageable sections is not a suggestion; it is a hard-and-fast rule. You must conquer one small area completely—apply, shape, and clean—before moving to the next. This requires a level of discipline that is contrary to the “get it all done” mentality.
Your setup is as important as your technique. Have multiple sets of tools, buckets of clean water, and sponges ready before you mix the first drop. Taping off adjacent surfaces, the ceiling, and the shower pan is non-negotiable. It is far easier to remove tape than to scrape cured epoxy off a finished surface. The “micro-batch” method, combined with a timer, transforms this daunting task into a predictable, repeatable process.
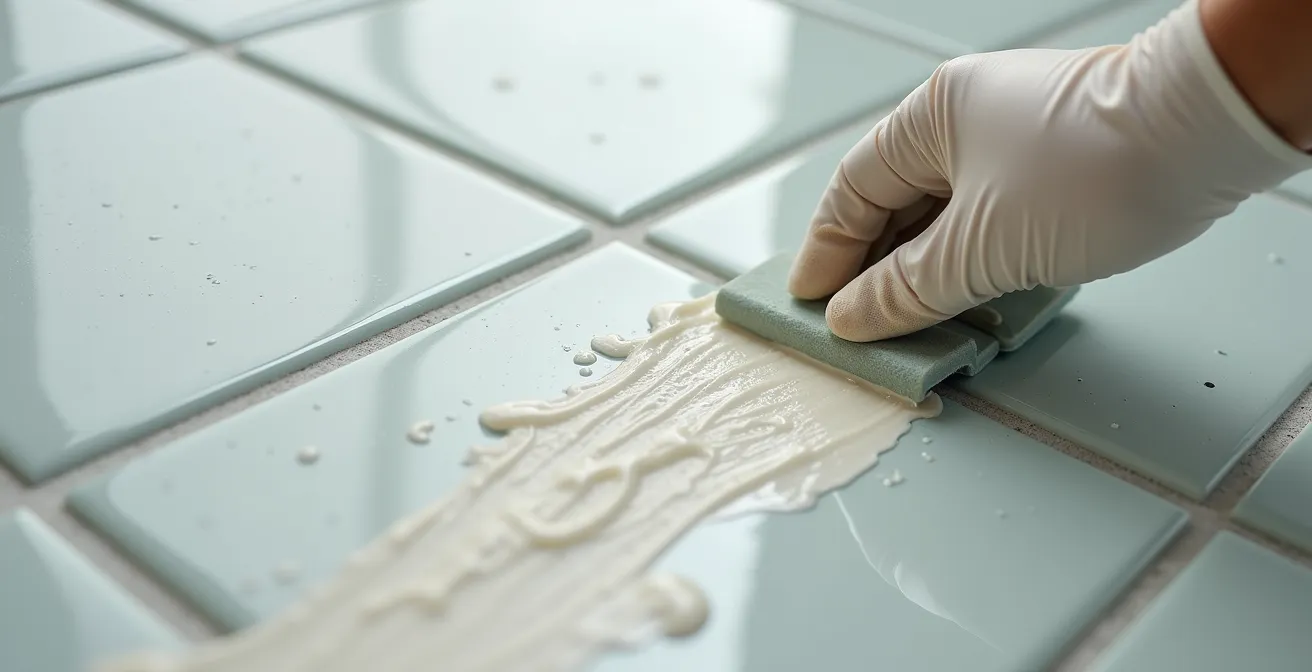
The texture of the epoxy is your guide. It should be applied with firm pressure to ensure the joints are fully packed, and the excess should be “shaved” off the tile surface with the float held at a steep angle. The initial cleanup must be done while the material is still pliable, using the manufacturer’s recommended cleaning agent or a specific vinegar solution.
Your Action Plan: The Micro-Batch Method for Epoxy Grout
- Tape off all adjacent surfaces, fixtures, and the shower floor before you open the epoxy containers.
- Calculate the exact square footage of a small, manageable area (3-4 sq. ft.) and mix only enough epoxy for that single batch.
- Work with a timer. Set it for the manufacturer’s working time (often 20-30 minutes), and respect it. When the timer goes off, that batch is done.
- Use disposable tools or have multiple sets ready. Do not try to clean a float in the middle of the process.
- Begin the initial cleanup with a vinegar solution or recommended cleaner immediately, while the epoxy is still workable.
By respecting the chemical properties of epoxy and adhering to a strict process, you can achieve a result that is not only beautiful but also functionally superior to any other grout available.
Large Slabs or Small Mosaics: Which Is Safer for a Shower Floor?
The choice of tile for the shower floor is not merely aesthetic; it is a critical decision that directly impacts the long-term integrity of your waterproofing system. The prevailing wisdom often suggests small mosaic tiles for better grip. While slip resistance is important, this advice overlooks a more significant risk: the number of grout joints. Every grout joint is a potential point of failure. A floor with 2×2 inch mosaics has hundreds of sealed joints, while a floor with a single large-format slab might have only one or two.
A 10-year study by professional installers at TileCoach documented over 300 shower installations. Their findings were definitive: large-format tiles paired with linear drains had 75% fewer callbacks for leaks compared to mosaic installations. The reason is simple and mathematical: reducing the number of grout joints dramatically reduces the number of potential failure points. While modern epoxy grout is incredibly resilient, minimizing the reliance on it is a superior engineering strategy.
This does not mean large format tiles are always the answer. They demand a much higher level of skill to install. The substrate must be perfectly flat, and the slope to the drain must be flawlessly executed, which is why they pair best with linear drains that only require a single-plane slope. Mosaic tiles are more forgiving and can easily conform to the compound slope of a traditional center point drain. The key is to understand the trade-offs you are making with each choice.
The following table breaks down the critical differences between these two common options, based on a comparative analysis of shower floor systems.
| Feature | Large Format (12×24+) | Small Mosaic (2×2) |
|---|---|---|
| Grout Lines (Leak Points) | Minimal – 3-4 lines total | Extensive – 100+ joints |
| Slip Resistance (DCOF) | 0.42+ with textured surface | 0.38-0.60 varies by material |
| Drain Compatibility | Best with linear drains | Works with any drain type |
| Installation Difficulty | Requires perfect slope | More forgiving on slopes |
| Waterproofing Integrity | Superior – fewer penetrations | Moderate – many seal points |
If you possess the skill for a perfect slope, a large-format tile offers a structurally superior, more waterproof floor. If you are less confident, the numerous grout lines of a mosaic floor become your primary line of defense, demanding perfect grout application.
The Adhesion Mistake That Cracks Tiles When You Step on Them
A tile that is not fully supported by mortar is a broken tile waiting to happen. The single most common cause of cracked floor tiles and adhesion failure is the presence of hollow spots, or voids, in the mortar bed. These voids create stress points and act as tiny reservoirs for any moisture that might get past the grout, leading to systemic failure. The goal is 100% mortar coverage, and for wet areas, it is absolutely non-negotiable.
The Tile Council of North America (TCNA) sets the standards for tile installation, and their guidelines are unequivocal. For wet environments like a shower, TCNA standards specify 95% minimum mortar coverage for all tiles. Achieving this is not a matter of luck; it is a matter of precise technique. The amateur method of dabbing a few blobs of mortar on the back of a tile (“spot-bonding”) is a guaranteed path to failure. The mortar must be applied with a notched trowel, creating consistent ridges in a single direction.
For any tile larger than 8×8 inches, “back-buttering” is not optional; it is mandatory. This involves applying a thin, flat coat of mortar to the back of the tile before placing it into the ridged bed on the wall or floor. When the tile is set with a slight sliding motion perpendicular to the trowel lines, the ridges collapse and spread, filling all voids and creating the monolithic bond required for a durable installation. You must periodically lift a freshly set tile to check your coverage. If you see anything less than 95% contact, your technique is wrong and must be corrected immediately.
Your Action Plan: The Professional Back-Buttering Protocol
- Apply mortar to the substrate with a notched trowel, combing the ridges in a single, parallel direction. Never swirl.
- For every tile over 8×8 inches, apply a thin, flat skim coat of mortar to the back of the tile (back-buttering) using the flat side of your trowel.
- Set the tile firmly into the mortar bed with a slight sliding or twisting motion to collapse the trowel ridges and eliminate air pockets.
- Periodically pull up a random tile and inspect the back. You must see near-total coverage. Adjust your trowel notch size or technique if you do not.
- After setting, use a grout float or a rubber mallet to gently tap the tile, ensuring uniform contact across its entire surface.
Remember, a hollow sound when you tap on a tile is the sound of future failure. Your goal is the solid, reassuring thud of a perfectly bonded installation.
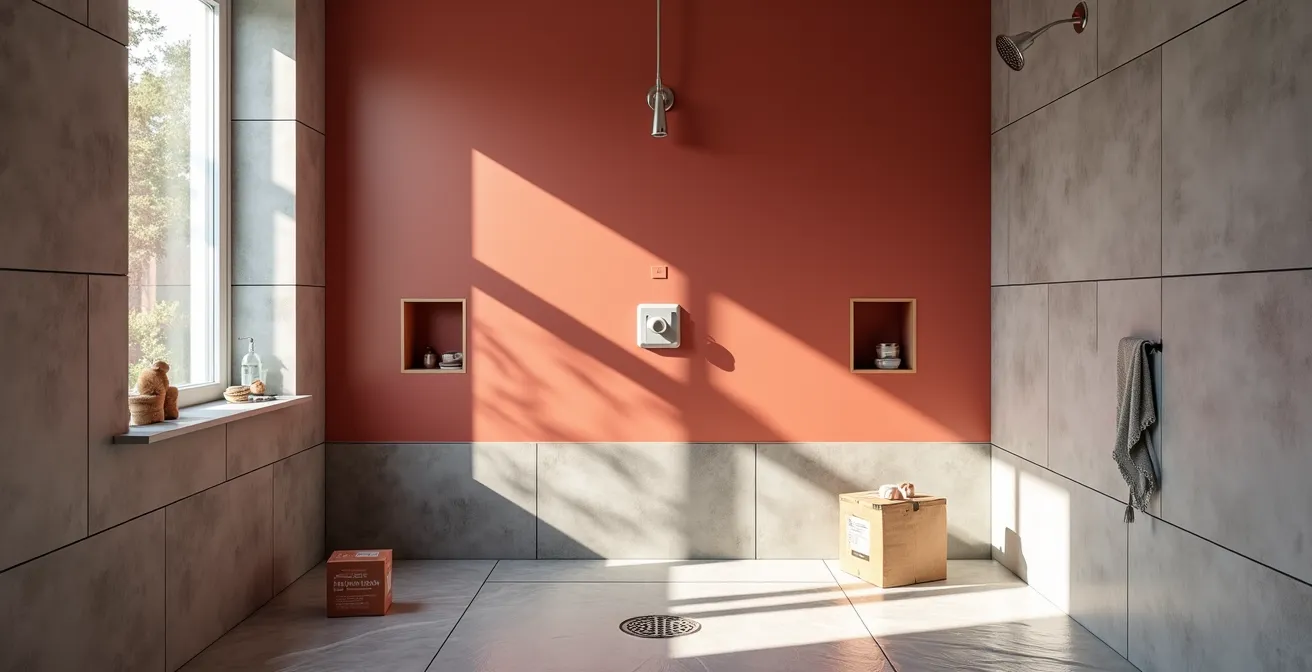
Layout Planning: Avoiding Tiny Tile Cuts at the Wall Edges
Nothing screams “amateur DIY” more than a tile layout with tiny, awkward sliver-cuts at the edges or corners. Beyond aesthetics, these small pieces are weaker, harder to grout properly, and can be sharp and hazardous. A professional-looking and structurally sound tile job is the result of meticulous planning that begins before a single tile is set. The goal is to achieve visual balance, with cuts at both ends of a wall being roughly equal and no smaller than half a tile’s width.
The secret to this is the centerline method. Instead of starting with a full tile at one edge and hoping for the best, you begin your layout from the center of the wall. By finding the center point and dry-laying your tiles outwards, you can immediately see the size of the final cut at each end. If the cuts are unacceptably small, you simply shift your starting reference line by half a tile. This guarantees that your layout is symmetrical and that the cuts at both ends will be identical and substantial.
This planning becomes even more critical when features like niches or windows are involved. A common mistake, as documented in a DIY case study, is to plan the main wall layout without considering the niche. This often results in an ugly sliver of tile just above or below the niche frame. The correct approach is to always start your layout from the most prominent feature wall. The niche should be framed by full or large-cut tiles, making it an intentional design element, not an afterthought. Your entire wall layout should be dictated by the placement of these features.
Your Action Plan: The Centerline Method for Professional Layouts
- Measure the total width of the wall and divide by two to find the exact center point. Mark it clearly.
- Dry-lay a row of tiles with spacers from your center mark out to each edge to preview the size of your final cut pieces.
- If the edge cuts are less than half a tile wide, adjust your starting point by shifting the centerline over by exactly half the width of one tile.
- Use a laser level or a plumb bob and chalk line to mark your final vertical reference line. This is your unchangeable starting guide.
- Begin your installation by setting the first full tile against this adjusted reference line, working outwards from the center.
A well-planned layout is the difference between a functional-but-flawed job and a truly professional installation that looks intentional and will last a lifetime.
How to Safely Route Laundry Water to Your Flower Beds?
To truly master shower waterproofing, we must understand that the principles are universal. Let’s step outside the bathroom for a moment. Consider a greywater system that routes laundry water to a garden. It seems unrelated, but the core challenge is identical: moving water from Point A to Point B without leaks and without damaging the surrounding structures. The same physics of gravity, pressure, and material integrity apply.
Professional contractors often apply the same fundamental principles from shower installations to these outdoor systems. For a greywater system to be safe and effective, it requires two things above all else: a consistent, uninterrupted slope and perfectly sealed connections. A minimum grade (typically 2%, or 1/4 inch per foot) is non-negotiable to ensure gravity does the work and no water is left standing in the pipes to become stagnant or freeze.
The connections between pipes are the system’s weakest points, just like the seams in a shower. A case study of robust greywater systems shows they rely on heavy-duty rubber gaskets and compression fittings that function exactly like the flange of a shower drain. These create a positive, mechanical seal that can withstand ground shifts and temperature changes. Furthermore, the most durable systems incorporate root barriers around foundations, which are functionally identical to a shower pan liner—an impermeable layer designed to protect a critical structure from moisture intrusion.
By seeing these principles at work in a different context, we reinforce their absolute importance. A leak is a leak, whether it’s under your tile or in your backyard.
The Drainage Mistake That Creates Gullies Instead of Solving Them
Let’s take another lesson from the outside world: landscape drainage. When a homeowner tries to solve a soggy-yard problem by digging a simple trench, they often make it worse. Without the correct slope and a protected channel, the flow of water quickly erodes the soil, turning a shallow swale into a deep, destructive gully. The problem they were trying to solve—uncontrolled water—has simply been focused into a more powerful, damaging form.
This is a perfect, large-scale analogy for a shower pan. The most critical and most frequently botched part of a shower floor is the “pre-slope.” This is a sloped layer of mortar that sits *underneath* the waterproof pan liner. Its sole purpose is to ensure that any water that penetrates the top mortar bed and tile has a path to the drain’s weeping holes. The required slope is identical to that of effective landscape drainage: a minimum of 1/4 inch of fall for every foot of run.
When this pre-slope is built incorrectly, is flat, or worse, slopes away from the drain, it creates the exact same problem as the failed yard drainage. Water becomes trapped on top of the pan liner, creating a perpetually saturated, stagnant bog under your tiles. This is a “shower pan gully.” It won’t erode your floor, but it will lead to mold, mildew, and the eventual failure of the entire system. As one analysis of shower failures notes, the pre-slope requirement in shower pans directly mirrors landscape drainage errors where insufficient grade creates erosion gullies instead of proper water flow.
Gravity is your best tool, but only if you command it. A proper pre-slope ensures that gravity is always working for you, directing every last drop of water exactly where it needs to go: down the drain.
Key Takeaways
- Waterproofing is a system, not a product. Success depends on the flawless integration of every layer.
- Fewer points of failure are always better. This means minimizing grout joints on floors and ensuring 100% mortar coverage everywhere.
- The principles of water management are universal. Slope and sealed connections are non-negotiable, whether in a shower, a yard, or a wall.
How to Waterproof Your Facade Without Trapping Moisture Inside?
Our final lesson comes from the world of modern architecture. Think of your shower wall as an “indoor facade.” It is subjected to intense, driving moisture on a daily basis. The principles that keep a skyscraper’s exterior wall dry and durable are the same ones that will protect your shower’s wall cavity. The most important of these is avoiding the “moisture sandwich” by managing vapor permeability.
Modern high-performance buildings use a “rainscreen” system. There’s an outer cladding (the facade) that sheds the bulk of the water, an air gap, and then a water/air control layer on the building itself. This system works because it allows any moisture that gets behind the cladding to dry out. It can dry outwards through the cladding or inwards into the building. The key is that it *can* dry.
A modern shower waterproofed with a surface-applied membrane like KERDI functions on the exact same principle. The tile and grout act as the “facade,” shedding most water. The membrane behind it is the absolute water control layer. Crucially, this system allows the wall cavity behind the membrane to dry inward if it ever gets wet. The disaster of the “moisture sandwich” occurs when a builder installs a plastic vapor barrier behind the cement board and then a waterproof membrane on the front. This traps the cement board between two non-permeable layers, ensuring that any moisture that gets in can never, ever get out. It is a recipe for rot.
As building science research shows, shower membranes must have the right vapor permeability (around 0.5-1.0 perms) to function correctly within a wall assembly. They need to be waterproof, but not so impermeable that they prevent the entire wall system from breathing and managing incidental moisture. It is a delicate balance of stopping liquid water while allowing water vapor to pass.
By understanding these advanced principles, you move beyond simply following steps and begin to truly engineer your shower for zero-failure performance. You are not just building a bathroom; you are building a lasting, high-performance component of your home.