
The secret to family-proof flooring isn’t its total thickness, but its ability to be easily repaired and resist catastrophic failures.
- The wear layer’s quality and coating are more critical for scratch resistance than the plank’s overall thickness.
- Proper subfloor preparation and choosing the right installation method (glue-down vs. floating) prevent long-term issues like warping and water damage.
Recommendation: Prioritize a floor with a high-quality wear layer (20 mil for high traffic), an SPC core for stability, and plan your installation to allow for future appliance repairs.
You’ve seen the ads: beautiful, pristine vinyl plank flooring gleams in a spotless home, promising an “indestructible” solution for your life with kids and pets. You invest, and for a few months, it’s perfect. Then, reality hits. A dragged chair leaves a white scar. A tipped water bowl causes a plank to cup at the edges. The afternoon sun creates a strange, warped bubble near the patio door. The dream of a worry-free floor quickly becomes a source of constant stress.
Most advice focuses on generic points like total thickness or “100% waterproof” labels. While not wrong, these are surface-level platitudes. They don’t prepare you for the real-world failure points that turn a minor issue into a major, expensive headache. The goal isn’t to find a mythical floor that never gets damaged; it’s to choose a flooring *system* that is resilient, stable, and designed to fail gracefully—meaning it can be fixed quickly and cheaply.
This guide moves beyond the showroom shine to focus on the technical decisions that matter. We’ll explore why the thin, transparent wear layer is your true line of defense, how the unseen subfloor is the foundation of success, and why planning for a dishwasher replacement *before* you lay the first plank can save you thousands. By shifting your mindset from invincibility to resilience, you can choose a floor that you can truly live with, not just look at.
This article provides a detailed roadmap to making a smart, long-term flooring decision. Below is a summary of the critical points we will cover to ensure your new floor can handle the beautiful chaos of family life.
Summary: A Guide to Choosing Resilient PVC Flooring
- Why the Wear Layer Thickness Matters More Than Total Thickness?
- How to Level Your Subfloor Before Laying Vinyl Planks?
- Glue-Down or Floating: Which Is Better for a Kitchen with Heavy Appliances?
- The Window Mistake That Warps and Fades PVC Floors
- When to Install Flooring: Before or After Installing Kitchen Cabinets?
- Why Your Concrete Floor Has a Higher Carbon Footprint Than You Think?
- How to Design Products That Take 5 Minutes to Repair Instead of Replace?
- How to Reduce Footstep Noise for Your Downstairs Neighbors?
Why the Wear Layer Thickness Matters More Than Total Thickness?
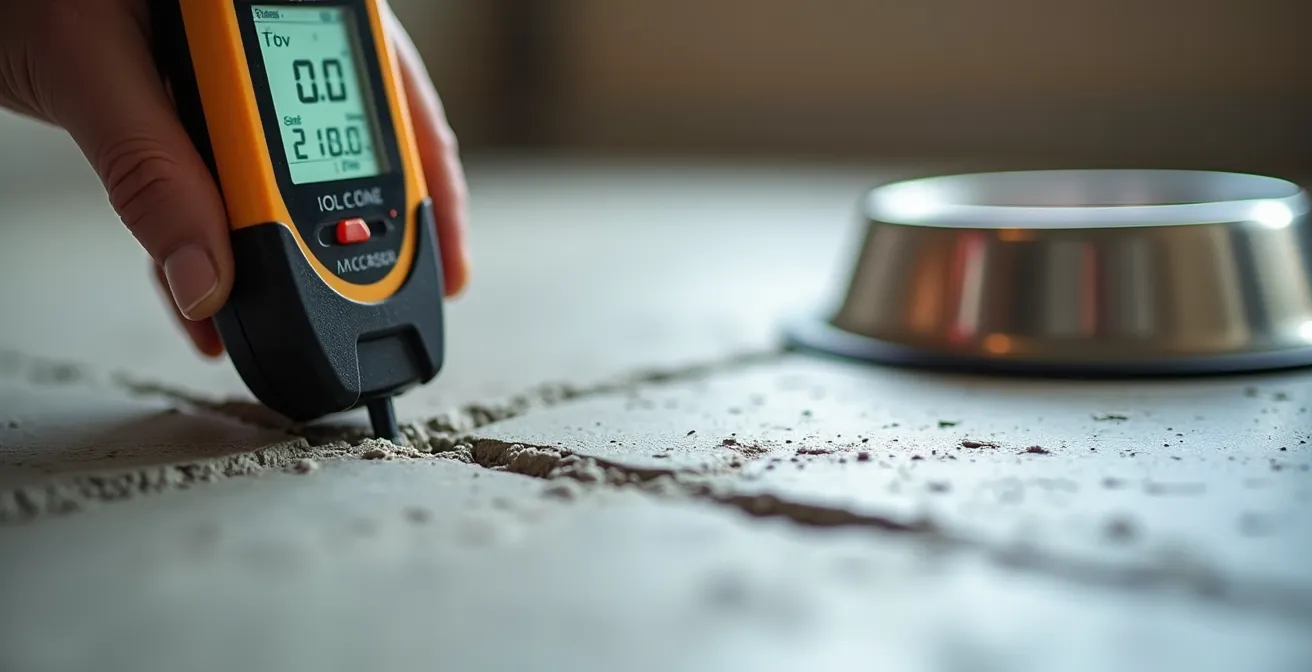
When comparing vinyl planks, it’s easy to get fixated on the overall thickness—a 5mm plank feels more substantial than a 4mm one. However, this is a common misdirection. The durability of your floor against scratches from dog claws, toy trucks, and dragged furniture has almost nothing to do with the total plank thickness. The real hero is the wear layer, a transparent top coating measured in mils (one-thousandth of an inch).
Think of the total thickness as the mattress and the wear layer as the high-thread-count sheets protecting it. The mattress provides comfort and structure, but the sheets take all the daily abuse. A thick, low-quality wear layer will scuff and haze quickly, while a thinner, technologically advanced one can offer superior protection. For a busy home, a minimum of 12 mil is recommended for moderate traffic areas, but for hallways, kitchens, and play areas, you should aim for 20 mil or thicker.
Furthermore, not all wear layers are created equal. Modern flooring data reveals that a 12 mil wear layer with an aluminum oxide coating can outperform a standard 20 mil layer without it. These advanced coatings add a level of scratch resistance that the raw PVC material cannot match. When shopping, look for specifications that mention ceramic bead or aluminum oxide coatings, as these are the true indicators of a floor that can stand up to the daily grind of family life.
How to Level Your Subfloor Before Laying Vinyl Planks?
You’ve chosen the perfect plank with a robust wear layer, but the most critical component of your new flooring system is one you’ll never see: the subfloor. Laying vinyl planks over an uneven surface is the number one cause of long-term failure. Even minor bumps or dips will eventually “telegraph” through the vinyl, causing unsightly ridges, premature wear, and a clicking sound as people walk over them. With floating floors, an uneven subfloor can cause the locking mechanisms between planks to fail, leading to gaps and separation.
Before any plank is laid, your subfloor must be checked for levelness. The industry standard is a maximum deviation of 3/16 of an inch over a 10-foot span. You can check this yourself with a long, straight board or a laser level. High spots on a concrete subfloor can be ground down, while low spots can be filled with a self-leveling compound. For wooden subfloors, sanding high spots and using leveling compound or installing a new layer of plywood may be necessary.
The type of vinyl core you choose can offer some forgiveness. As one case study showed, rigid SPC (Stone Plastic Composite) planks can handle more subfloor variation than flexible LVT. A homeowner reportedly saved $800 in floor preparation costs by choosing a 5mm SPC plank that could be installed over minor imperfections. However, this is not a substitute for proper prep. A flat, stable subfloor is the only way to guarantee the integrity and longevity of your flooring investment.
Glue-Down or Floating: Which Is Better for a Kitchen with Heavy Appliances?
The choice between a glue-down and a floating (click-lock) installation is a major decision, especially in a kitchen. Floating floors are popular for their DIY-friendly nature and lower installation costs. However, in a high-traffic area with heavy point loads like a refrigerator or a loaded kitchen island, they have weaknesses. Over time, the weight can cause indentations or prevent the floor from expanding and contracting naturally, leading to buckling or “peaking” at the joints.
A glue-down installation, where each plank is fully adhered to the subfloor, creates a much more stable and permanent surface. It offers superior support under heavy appliances, eliminating any risk of movement or indentation. Furthermore, it provides better protection against water damage. If a leak from a dishwasher or ice maker occurs, a glued-down floor forms a more effective moisture barrier, preventing water from getting trapped underneath and damaging the subfloor—a common and costly problem with floating floors.
The final, crucial advantage is repairability. If a plank in the middle of a floating floor is badly damaged, you must disassemble the entire floor from the nearest wall to replace it. With a glue-down floor, a single damaged plank can be heated, removed, and replaced with minimal disruption. This is a critical consideration for a home with pets and children, where accidents are inevitable.
This comparative analysis highlights the key trade-offs for a busy household.
| Feature | Glue-Down | Floating |
|---|---|---|
| Heavy Appliance Support | Excellent – No movement under point loads | Good – May indent over time |
| Single Plank Repair | Easy – Remove and replace one plank | Difficult – Must disassemble from wall |
| Water Leak Protection | Superior – Creates moisture barrier | Risk of water trapping underneath |
| Installation Cost | Higher – Requires adhesive and labor | Lower – DIY friendly |
| Subfloor Requirements | Must be perfectly flat | More forgiving of minor imperfections |
The Window Mistake That Warps and Fades PVC Floors
One of the most overlooked enemies of PVC flooring is direct, intense sunlight. Large, south-facing windows without proper UV protection can wreak havoc on your beautiful new floors. The heat can cause the planks to expand excessively, leading to warping, buckling, or peaking at the seams. This property is known as dimensional stability, and it varies significantly between different types of vinyl cores. Over time, the UV rays will also cause the printed design layer to fade, creating a discolored patch on your floor.
Modern windows with a Low-E (low-emissivity) coating are designed to block a significant portion of UV rays and infrared heat, offering essential protection. If you have older windows, installing a high-quality UV-filtering window film is a cost-effective way to safeguard your investment. The color of your flooring also plays a role; lighter-colored planks reflect more heat and are less prone to heat-related expansion and fading than dark, dramatic colors.

The choice of core material is also critical for areas with high sun exposure. SPC (Stone Plastic Composite) cores are denser and more rigid than WPC (Wood Plastic Composite) cores, giving them superior dimensional stability under temperature fluctuations. While WPC offers better sound insulation and a softer feel underfoot, SPC is the clear winner for rooms that experience intense, direct sunlight. Regardless of the core, always ensure the installers leave the manufacturer-recommended expansion gap (typically 1/4 inch) around the perimeter of the room to allow for natural thermal movement.
When to Install Flooring: Before or After Installing Kitchen Cabinets?
It seems like a minor detail in a major kitchen renovation, but the sequence of installing your flooring and cabinets has massive financial implications. Many contractors prefer to install cabinets first and then cut the flooring around them to save on material and labor costs. This is a short-sighted decision that can lead to a catastrophic and expensive problem known as “appliance lock-in.”
Standard dishwashers, mini-fridges, and other under-counter appliances are built to a specific height. If you install a 5mm thick floor *after* the cabinets are in, you have effectively reduced the clearance for that appliance by 5mm. Everything is fine until that appliance breaks down. The new replacement model, built to the original standard height, will not fit into the now-too-short opening. Your only solution is to either find a non-existent smaller appliance or pay a professional to uninstall your countertops and cabinets just to create the needed clearance.
A real-world case study highlights this nightmare scenario: a homeowner who installed flooring after their cabinets were in place faced a $2,400 cabinet removal bill simply to replace a broken dishwasher. The appliance was trapped by the flooring that did not extend underneath it. The correct method is always to install the flooring across the entire subfloor first. The cabinets and appliances are then installed on top of the finished floor. This not only prevents appliance lock-in but also provides a continuous, sealed surface that offers better protection against hidden leaks from under the cabinets.
Why Your Concrete Floor Has a Higher Carbon Footprint Than You Think?
When considering the environmental impact of flooring, we often think about the materials themselves. Polished concrete is sometimes promoted as a “green” option because it uses the existing slab. However, this overlooks two critical factors for a family home: lifecycle sustainability and indoor air quality. A floor that fails and needs to be replaced every five years has a much larger carbon footprint than one that lasts for twenty, regardless of its initial composition.
Durability is the ultimate form of sustainability. An analysis comparing flooring costs over a 20-year period is revealing: a cheap vinyl floor with a thin 4-mil wear layer, needing replacement every 5 years, could cost a family $24.45 per square foot in total. In contrast, a high-quality plank with a commercial-grade 40-mil wear layer, costing $7.00 per square foot upfront, lasts the entire 20-year period. By choosing a durable product, you dramatically reduce waste, manufacturing energy, and transportation emissions over the long term.
The other hidden environmental cost is its impact on indoor air. Many building materials, including some adhesives and even concrete sealers, release Volatile Organic Compounds (VOCs) into the air. For children and pets who spend much of their time on or near the floor, this is a significant health concern. To address this, look for vinyl flooring that is GREENGUARD Gold certified. This third-party certification ensures that GREENGUARD Gold certified vinyl floors meet stringent chemical emission limits, contributing to safer indoor air quality for the most vulnerable members of your family.
How to Design Products That Take 5 Minutes to Repair Instead of Replace?
The smartest approach to a family-proof floor is to accept that minor damage is inevitable and to plan for easy repairs. A deep gouge or a stubborn stain doesn’t have to mean a costly professional visit or an unsightly blemish you learn to live with. By adopting a “design for repair” mindset from the beginning, you can handle most incidents yourself in minutes. This strategy relies on having the right tools, the right knowledge, and a few spare planks.
Before any furniture is moved in, take photos of each room to map the plank layout. This will be invaluable if you ever need to locate a specific dye lot or plank size. As experts at The Hardwood Guys note in their guide, planning for traffic is key. They advise:
Choose flooring with a middle or higher wear layer if it will be in a high-traffic area – 12 mil works fine for residential homes, but 20 mil provides commercial-grade protection
– The Hardwood Guys, LVP Wear Layer Guide
Keeping a small, dedicated repair kit is essential. This should include color-matched vinyl putty for filling minor scratches, the manufacturer-approved cleaning solution, and most importantly, extra planks from the same dye lot. Store these planks flat in a climate-controlled space like a closet or under a bed to prevent them from warping over time. This preparation turns a potential disaster into a minor inconvenience.
Action Plan: Your 5-Minute Floor Repair System
- Build a Kit: Assemble a small box with color-matched vinyl putty, manufacturer-approved cleaner, a soft cloth, and a putty knife.
- Document Everything: Before installing furniture, take photos of each room’s plank pattern and label your stored extra planks with the room and installation date.
- Store Spares Correctly: Keep at least one box of extra planks from the same dye lot. Store them flat in a climate-controlled space to prevent warping.
- Practice Makes Perfect: If you have a glue-down floor, practice removing and replacing a plank in an inconspicuous area like a closet floor before you need to do it in the open.
- Use Gentle Heat: For glue-down plank removal, use a heat gun on a low setting to gently soften the adhesive, making it much easier to lift the plank without damaging the subfloor or surrounding planks.
Key takeaways
- Focus on the wear layer (20 mil for high traffic) and its protective coating, not just total plank thickness.
- A level subfloor is non-negotiable; it prevents long-term failures like gaps and warping.
- Choose a glue-down installation in kitchens for better stability and easier single-plank repairs.
How to Reduce Footstep Noise for Your Downstairs Neighbors?
In a busy household, durability isn’t the only concern. The constant pitter-patter of little feet, the click-clack of a dog’s claws, or a dropped toy can create significant noise, both within your home and for any neighbors living below you. The acoustic performance of your flooring system can be the difference between a peaceful home and a source of constant tension. This is determined primarily by the plank’s core material and the use of an underlayment.
There are two main types of rigid cores: SPC (Stone Plastic Composite) and WPC (Wood Plastic Composite). While SPC is lauded for its superior dent resistance and stability, its dense, rigid nature does a poor job of absorbing impact sound. It tends to transmit the “clicking” noises of pet claws more readily. WPC, on the other hand, contains a foaming agent that makes it lighter and less dense. This gives it a softer feel underfoot and significantly better sound-absorbing properties.
For maximum quiet, nothing beats a layered approach. Acoustic testing shows that certain WPC floors are 46% warmer and 70% quieter than standard LVP options, especially when they come with an attached cork underlayment. Cork is a natural and highly effective sound dampener. If you live in an apartment or condo with strict HOA rules on noise, combining a WPC core with a separate high-performance acoustic underlayment can provide the best possible sound reduction.
This comparison of core materials clearly shows the trade-offs between durability and acoustic comfort.
| Core Type | IIC Rating | Best For | Pet Noise Reduction |
|---|---|---|---|
| SPC (Stone Composite) | 50-55 | Durability | Fair – Transmits claw clicks |
| WPC (Wood Composite) | 60-65 | Sound absorption | Good – Softer, absorbs impact |
| WPC + Cork Underlayment | 65-70 | Maximum quiet | Excellent – Best for apartments |
| SPC + Separate Acoustic Pad | 65-72 | Custom solution | Excellent – Meets strict HOA requirements |

Ultimately, selecting the right PVC flooring is less about finding an indestructible material and more about building a resilient system. It requires shifting your focus from the surface-level appeal to the technical details that govern long-term performance and repairability. The perfect floor for a family with kids and dogs isn’t one that never shows a mark; it’s one where a mark can be fixed in five minutes, a leak doesn’t cause a subfloor disaster, and a broken dishwasher doesn’t require a full kitchen remodel. By making informed choices on the wear layer, subfloor, and installation method, you are investing not just in a floor, but in long-term peace of mind.